Learning how to create a GitHub portfolio is a great way to showcase your work as a Junior Developer and make it easy for potential employers or collaborators to see what you can do. In this step-by-step guide, we'll walk you through the process of creating a portfolio using GitHub Pages.
Step 1: Create a GitHub account
If you don't already have one, create a GitHub account. This will give you access to all of the tools you need to create your portfolio.
Step 2: Create a new repository
Once you're logged in to GitHub, click on the "+" button in the top-right corner of the screen and select "New repository". Give your repository a name (e.g. "portfolio") and select "Public". Then, click "Create Repository".
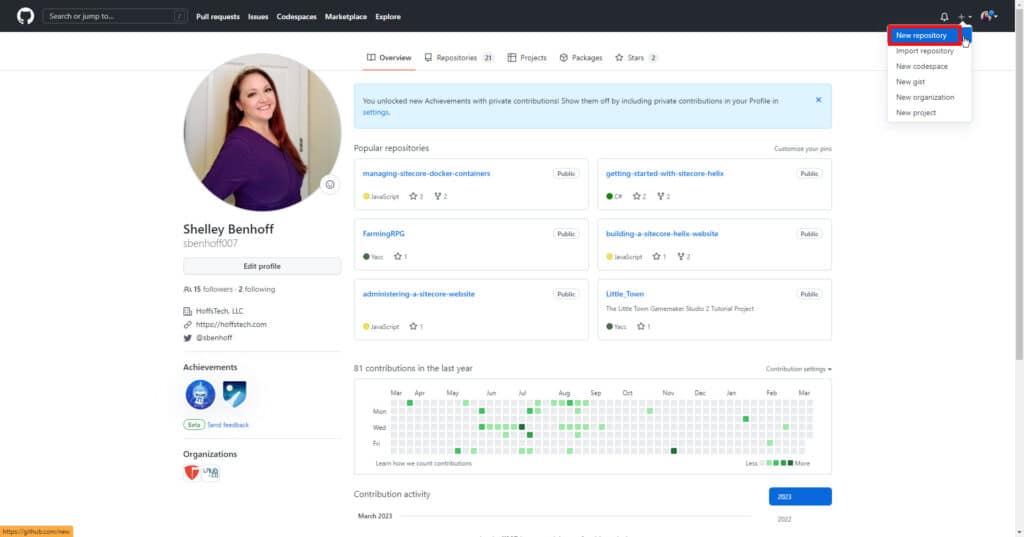
Create a GitHub Repository
Step 3: Enable GitHub Pages
In the Settings tab of your repository, scroll down to the GitHub Pages section and select "Main" branch as the source. This will enable GitHub Pages for your repository and make your portfolio live at "https://[username].github.io/[repository-name]".
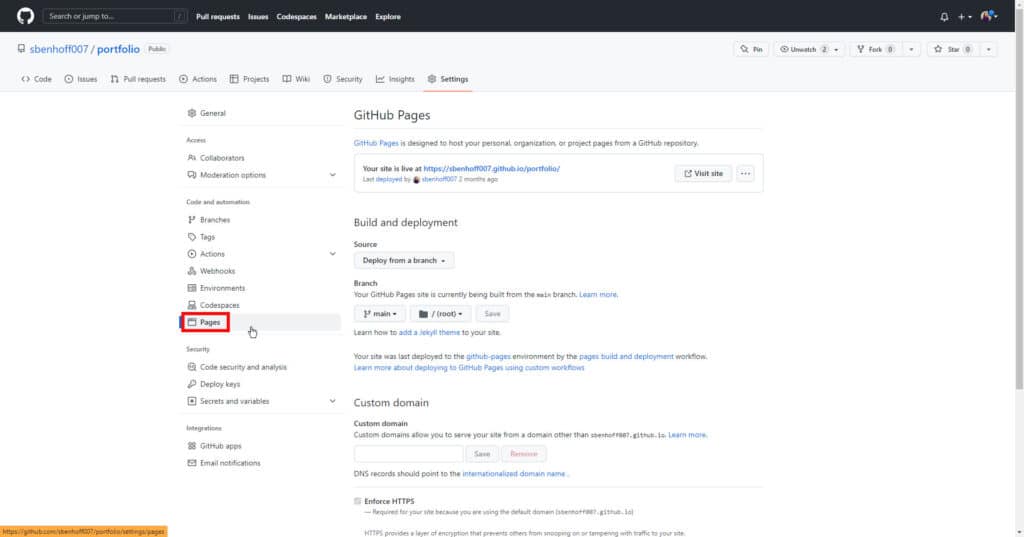
Create GitHub Pages
Step 4: Clone Your Repository
Next, you need to clone your repository to your local machine. You can do this either by using GitHub Desktop or the command line, whichever you prefer. You can find instructions for this in the code dropdown in your repository and you can clone your repository to any location on your local machine.
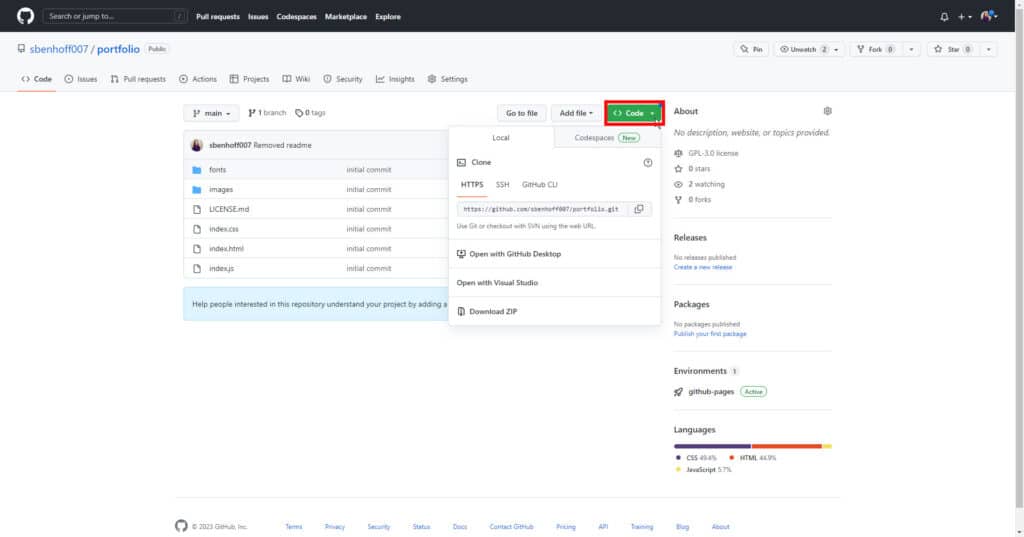
Clone a GitHub Repository
Step 5: Create the HTML and CSS for your portfolio
Now it's time to create the HTML and CSS that will make up the pages of your portfolio. You can do this using a code editor like Visual Studio Code, and you can use a framework like Bootstrap to make the process easier. There are also many free templates available to help you get started. Here's a link to the template I'm using.
You can also include screenshots and a brief description of your projects to give visitors an idea of what you've been working on.
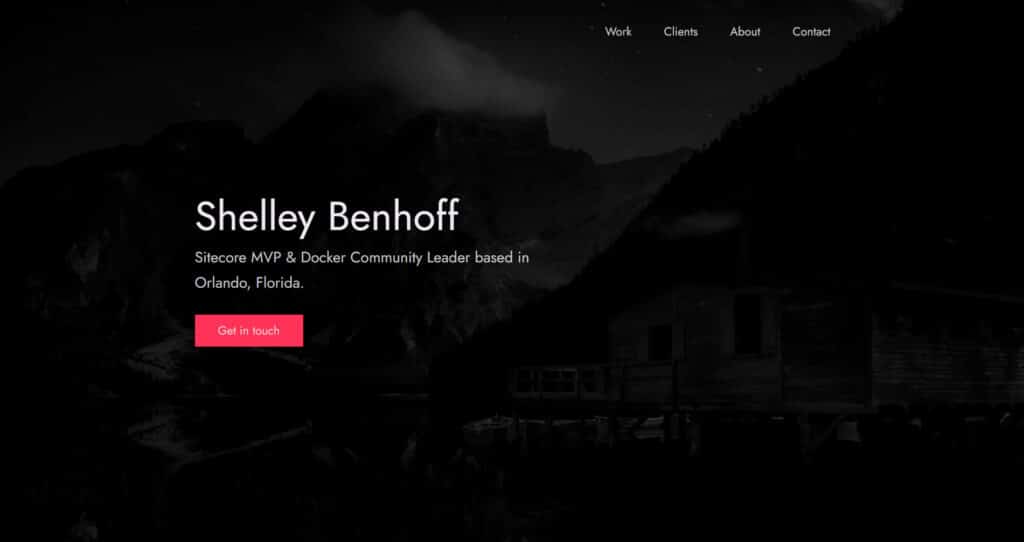
GitHub Portfolio Template
Step 5: Optimize for SEO
To optimize your portfolio for search engines, make sure to include keywords in your HTML files, including your skill sets in your title, description, and headings. You can also include meta tags to help search engines understand what your portfolio is about.
Step 7: Share your portfolio
Once you've finished creating your portfolio, push your code to your repository. You can do this using the Source Control panel for VSCode.
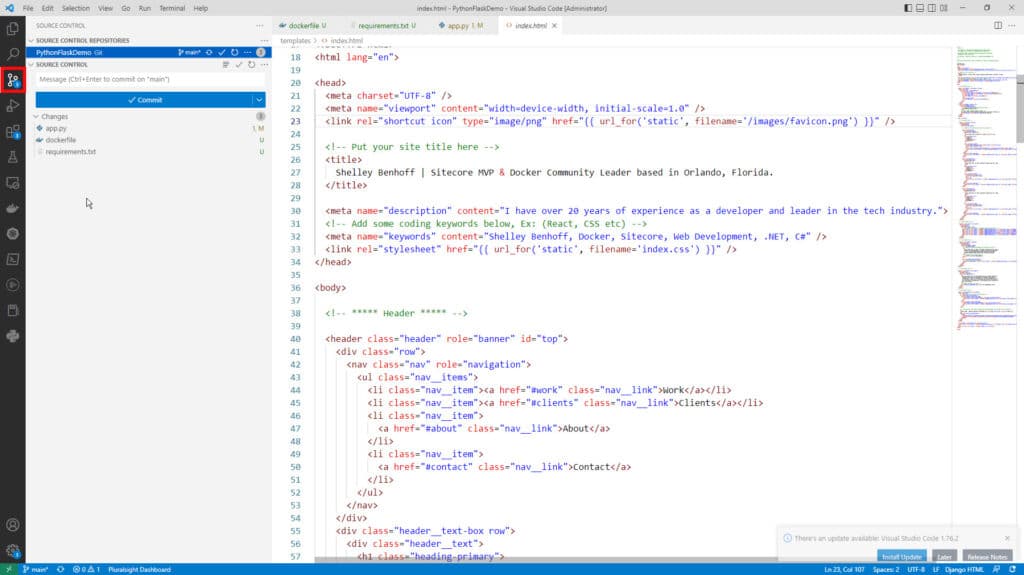
VSCode Source Control
If you go back to your repository settings, you should see the url for your website. You can share the link to your portfolio on your social media accounts, on your personal website, or in your email signature.
And that's it! By following these simple steps, you'll have a professional-looking portfolio that showcases your skills and makes it easy for potential employers or collaborators to learn more about you.
Learn More Tips On How To Create a GitHub Portfolio In My Tech Career Newsletter!
